
Close your eyes and imagine the evening air is filled with the savoury aroma of burning wood and baking bread. Gathered around are your loved ones, laughter filling the air as each person crafts their perfect pizza masterpiece. Glasses clink, voices mingle and the sun paints the sky with hues of orange and pink as it slowly descends. Life feels truly perfect.
If you are ready to take your outdoor gathering to the next level, its time to fire up a wood-fired pizza oven, and here is our guide on – how to cook the ultimate pizza.
Read on to learn how to cook a pizza in an outdoor pizza oven or on an outdoor fireplace with our pizza hood cooking accessory. Get detailed instructions, techniques, and tips to help you create your favourite pizza.
Pizza oven instructions
A traditional wood-fired pizza oven functions as a baking chamber, made of bricks, clay, concrete, stone, cob, or ceramic. Heated by a wood flame, the base and dome provide an insulating layer to trap in the heat. This forms a small pocket of hot air that circulates the pizza, cooking it evenly.
1. Dough preparation
We recommend making the pizza dough in advance, using fresh ingredients and letting it rise for at least 3 to 6 hours. The longer the dough has to rest, the more flavour it will develop.
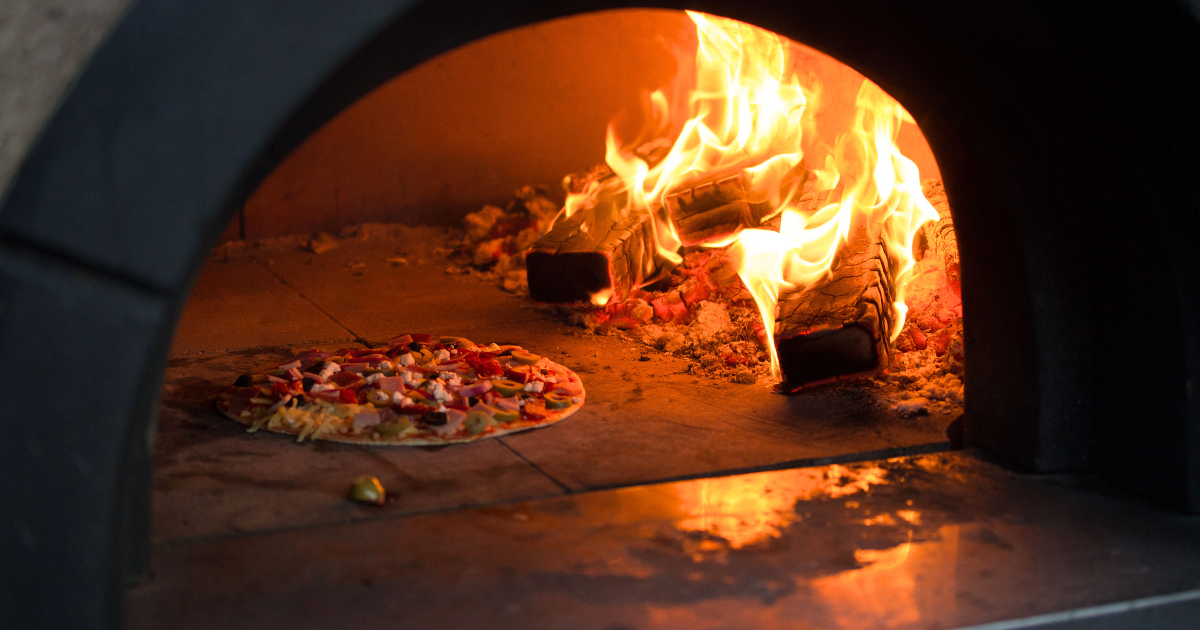
2. Choose the right firewood
Choosing the right wood will influence the heat and cooking time. We recommend opting for Manuka or Pōhutukawa as they are some of the hardest, densest wood species, burning hot, long, and often infusing food with a smoky flavour. For a more distinct flavour, you may like to consider fruitwoods like apple or cherry wood.
3. Heat the pizza oven
Heating your pizza oven can take 1-2 hours. Start by lighting a pile of kindling logs and firelighters at the front of the oven, checking back in 10 to 15 minutes. Add more kindling and some larger pieces of wood, being careful not to smother the flames.
Over 1 to 2 hours, spread the burning wood and add more until it burns steadily. About 30 minutes before you want to cook the pizza, stop adding wood.
This method of heating your oven works when cooking a limited number of pizzas however if you intend to cook food such as roasts or a large number of pizzas over a longer period of time, it is best to light the fire to one side and maintain this position so you can top up with wood as required.
4. Prepare your pizza bases
While the oven is building heat, get the dough out of the fridge and let it rest. When it reaches room temperature, lightly flour your work surface and press the dough into a large flat disc. Next, stretch the dough, holding one side up and letting gravity pull it down.
Gently rotate the dough to stretch it evenly until it is roughly 11 inches in diameter and ⅓ of an inch thick. One by one, carefully lift the base onto our pizza paddle and patch any holes.
5. Build your pizzas
When your bases are ready, you can start assembling your pizzas with your favourite sauces and fresh toppings.
If you are hosting, we recommend preparing a self-serving station, with an array of options for guests to pick and choose from. Popular toppings include cherry tomatoes, red onion, olives, chorizo, ham, prosciutto, capsicum, garlic, mushrooms, and chilli. Some toppings are better fresh and should be added after the pizza is cooked, such as basil and rocket.
Top tip — Less is more!
Stacking your favourite toppings too thick will prevent the heat from getting through, resulting in uneven heat distribution. Instead, create a thin, even layer of toppings like the picture below. This will ensure the entire pizza is well cooked, with a crispy crust and the perfect amount of flavour.
%20(1).png?width=920&height=700&name=trendz%20pizza%20blog%20images%20(1)%20(1).png)
6. Cook the pizza
When the oven is heated to 350-400°C, spread the embers and wood to the back to create space. Using our pizza paddle, place your pizza in the middle of the oven, straight onto the flat base and cook it for 2 to 5 minutes.
If you want to test the timing, we recommend cooking the first pizza base with garlic and butter to share as a delicious starter. When you’re happy with the timing, you can cook multiple pizzas at once, using the paddle to rotate them and achieve even heat distribution.
7. Enjoy your gourmet pizzas
When each pizza is ready, use our paddle to remove them from the oven and serve them to your guests. Be sure to have plates and drinks at the ready!
Outdoor pizza oven NZ
A pizza oven is more versatile and permanent than a barbecue, making it easy to churn out crispy pizzas, succulent roasts, and even slow-cooked stews. Even two hours after the fire goes out, high heat retention allows you to keep cooking. The benefits of a pizza oven include:
- A wide range of cooking options
- High heat retention
- Restaurant-quality pizzas at home
- A visually appealing landscaping feature
A pizza oven will quickly become a social hub in your outdoor space, whatever the season. From crispy pizzas to succulent roasts, it’s easy to prepare mouth-watering meals for your friends and family.
Whether it’s a balmy summer day or a chilly winter evening, our outdoor fireplace can also become a social hub, keeping you warm and providing ultimate cooking abilities. Browse our full range of cooking accessories or outdoor fireplace designs for more outdoor entertaining ideas.

Have a question? Contact us